Several of my customers have learned about the new feature of MOSS that includes publishing InfoPath forms to the server and thus allowing users that does not have InfoPath installed to fill in forms with no need for distributing nor purchasing InfoPath for each client.
One of the things they all have in common is that they all work in a Microsoft Active Directory environment and wish the form to load Meta data from the current user and to fill in the form with that data.
Now, InfoPath and AD does not have a method for creating a direct connection, but since all of our users also utilize the Microsoft Office SharePoint Server (MOSS) forms server – this means they can take advantage of other features and capabilities of MOSS for this problem.
MOSS connects to your AD easily and builds a user profile based on the data stored in AD for each user. This part is easy enough to perform so I will not elaborate further on that here.
Once your MOSS “knows” your users, you can make use of its web services to retrieve all users list, a specific user profile and also the current user profile.
Here I will demonstrate how to create a form that loads current user profile data as stored in AD without writing any bit of code.
The only thing that needs to be done is to define a connection to a certain web service that already exists in your SharePoint site out-of-the-box (OOTB).
Step 1: Create a blank form template
1. Click file->design a form template

Step 2: Setting up the web service connection
1. Create a new data source connection.
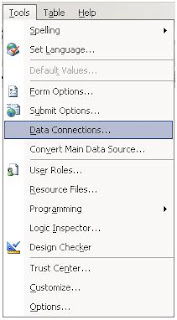
Go to tools –>Data connection
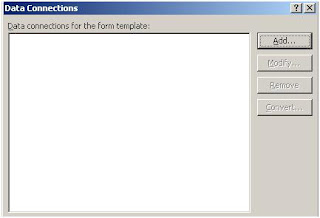
2. In the ”Data connections” dialog Click on Add
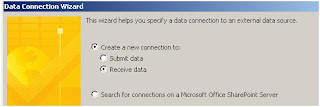
3. Select create a new connection to - Receive data Click next
4. Select Web service as the source type

5. Insert the Following web service name: http://<servername>/_vti_bin/userprofileservice.asmx?wsdl

6. Replace <servername> with your SharePoint server name and click next

2. In the ”Data connections” dialog Click on Add

3. Select create a new connection to - Receive data Click next

4. Select Web service as the source type

5. Insert the Following web service name: http://<servername>/_vti_bin/userprofileservice.asmx?wsdl

6. Replace <servername> with your SharePoint server name and click next
7. From the operations drop down list select GetUserProfileByName

8. In MOSS, calling this operation without sending a user name will return current user’s profile.
9. Click next keeping the defaults in every screen until you can hit Finish
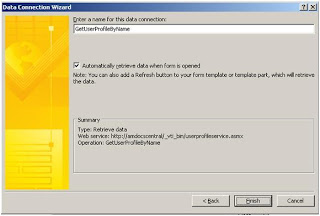
10. Close the Data connection window.

10. Close the Data connection window.
Step 3: viewing and choosing the AD details we wish to import:
Now, we need to insert the AD information to the correct fields. To do so, we first need to see what kind of data we can use.
Since the users profile may include different properties according to software installed on your organization and other dependencies, the web service results returns a set of “name-value” collection that we can use in order to get re results we need.
So – first, we have to find the “name” of the property we need and use it to get its value from the web service.
Here is how it is done:
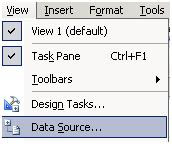
1. To see all the available fields click on View -> Data source
2. In the Data source drop-down select the one we just created.
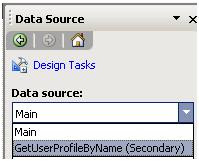

2. In the Data source drop-down select the one we just created.

3. Expand the DataFields container node and select the following fields in the results:

4. In the drop-down menu on the selected nodes select repeating table and place it in the form.
5. This created a repeating table with all data returned by the web service. To see all the AD fields available to you, Click preview in the tool bar.

6. Now, locate the property you need and copy its name
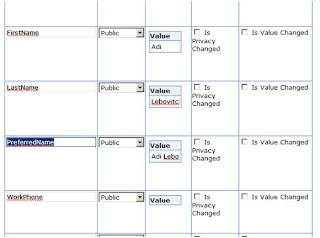
7. Return to the design mode by clicking close preview.

6. Now, locate the property you need and copy its name

7. Return to the design mode by clicking close preview.
Step 4: placing the AD details in the controls:
Now the only thing left for us to do is place the field we chose earlier in step 3 and define the control to show that field’s info.
Now the only thing left for us to do is place the field we chose earlier in step 3 and define the control to show that field’s info.
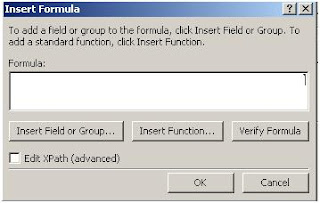
to open the function editor
4. In the next window select to data source you created

5. Expand all the folders under dataFields until you can select the Value node.
6. This inserts one of the “values” we got in the web service response. Now we have to make it “filter” the values by the property name we want.
7. Click on filter Data button. In the pop up window click on add
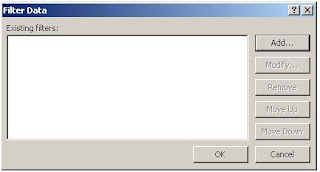
8. In the next window select the following options
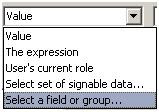
9. And select the “name” node from our service data source:
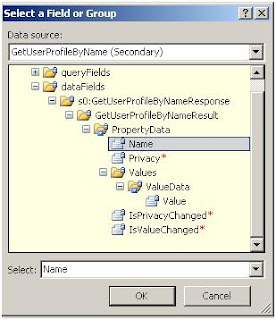
10. Click ok. Then Select type text and enter the property you copied in the previous section as the value

11.Click OK to confirm and close all the pop-ups.

8. In the next window select the following options

9. And select the “name” node from our service data source:

10. Click ok. Then Select type text and enter the property you copied in the previous section as the value

11.Click OK to confirm and close all the pop-ups.
Now your form displays the user preferred name as it was entered in the AD without writing 1 line of code!
Important:
Your document must be fully trusted in order to execute the web service correctly. To do so please check the tools-forms options form security options.
Important:
Your document must be fully trusted in order to execute the web service correctly. To do so please check the tools-forms options form security options.
This is a great demonstration how several Microsoft products can be combined to create excellent customer-specific solutions with just utilizing the capabilities of the OOTB features.
Post by: Adi Lebovich and Shai Petel.
Thanks,


