Friday, December 4, 2009

Work with Rating Field data, anywhere.

Great new article by Sveta Yerpilev, SharePoint Consultant for KWizCom Professional Services. Take a look:


Work with Rating Field data, anywhere.
by Sveta Yerpilev


Rating fields allow you to gather user opinions about your data. But sometimes you can have a problem displaying this data. In this article we will talk about using the Rating Field in Data View Web Parts and Custom List Forms and how to circumvent problems that might arise..

First of all it is important to note that a Rating field contains only numbers and can’t contain images or any other type of data. This means that if we want to show rating in a Data View Web Part row we need to build the images manually. How is this done?

Let’s take a look at the Rating field in a standard list view using IE Developer Toolbar. As we can see the image source equals to: “_layouts/KWizCom_RatingSolution/Images/[number].gif”.
So we can open this folder – 12/Templates/Layouts/KWizCom_RatingSolution/Images - and find all “star” images that our rating solution uses.
This is where you can change or overwrite the default images of the Rating solution to suite them to your own design.


So how can we use this knowledge in the Data View Web Part? When you try to add a Rating field to the Data View Web Part you’ll see the following code:
where “Rating” is the name of your Rating field. This code will show you the rating as a number with the value of 1-5. To show an image instead of a number you need to replace the existing code with the following string:

<img
src="http://www.blogger.com/_layouts/KWizCom_RatingSolution/Images/{@Rating}.gif"
/>


This code will build the image source link according to the rating value of the item, so you will see the right image.

Well, now we can see images instead numbers. Great! But what if we need to rate from the Data View Web Part? How do we make our image clickable?

We need to use the IE Developer Toolbar one more time to discover the function that opens additional pop-up window with the ability to rate...
Here is the function:

commonShowModalDialog('http://siteURL/_layouts/KWizCom_RatingSolution/RatingPopup.aspx?itemId={@ID}&listId=ListID','dialogHeight:450px;dialogWidth:350px;scroll:no;toolbar:no;status:no;resizable:no;',
null, this.parentNode);

This is a long function that must contain the item and the list ID. But if we can get the item ID from the data source, we can just use the List ID as it is because most of the time we only use one static list in our Data View Web Part. So just replace the “ListID” with your List ID, siteURL with your site URL and enter this function as an ”onclick” event function in our rating image.
We will then get the following code:

<img
onclick="commonShowModalDialog('http://siteURL/_layouts/KWizCom_RatingSolution/RatingPopup.aspx?itemId={@ID}&listId=ListID'
,'dialogHeight:450px;dialogWidth:350px;scroll:no;toolbar:no;status:no;resizable:no;',
null, this.parentNode);"
src="http://www.blogger.com/_layouts/KWizCom_RatingSolution/Images/%7B@Rating%7D.gif"
/>

Now we have a clickable image that can be used to view a summary of previous user rating and so that you can rate. But what about the details? How can we show all the ratings and comments attributed to an item? We definitely need the “Details” link here.

Choose the link’s place in your DataView and add the following code after you changed the siteURL and ListID parameters:

Details

This code will add a link displayed as “Details” to your Data View Web Part. You can change the word “Details” to any other word or sentence.


That’s it. Now we can create Data View Web Parts and Custom list forms that know how to work with the rating field.

Here is a sample for Print View for one of the Articles list in SharePoint:


Simple as that!

Thursday, December 3, 2009

How to fix Publishing Pages manually

Take a look at the latest article by Armine Vardanyan, SharePoint Implementer for KWizCom Professional Services

***************************

Have you ever seen the error: “Unexpected error has occurred” when you edit a page, after deploying a SharePoint site to another server or another environment?


It is a very common occurrence…


Problem:
When you move a publishing page, it contains a link to a page layout with an absolute address:
http://incorrect_servername/_catalogs/masterpage/PageLayout.aspx, Article page with image on left


Solution:
Open the Pages Library where your page is saved.
Click “Actions”, and then click “Open with Windows Explorer”.
Or Click “File” > “Open…” > Paste the link of the Pages Folder and check the checkbox “Open as Web Folder”
Copy your page to the desktop.
Open it in notepad.
Search for the tag and change the “incorrect_servername”(see above) to your site name.
Save.
Copy it back to your Pages library.

Now you will be able to fix your page without receiving the error notice.

Hope this helped!

Tuesday, November 17, 2009

Upgrading SLFE from 2007 to 2010 - SPS Philly

** Updated: http://kwizcom.blogspot.com/2010/08/upgrading-customized-solutions-in.html **

Did you miss Shai Petel’s session at SharePoint Philly?
You can see his presentation: Upgrading SLFE from 2007 to 2010, specially revamped for SPS Philly.
Enjoy!

Tuesday, November 10, 2009

How to install WSP SharePoint Solution Package

Download the zip file: WSP Installer

Extract the batch file from the zip into the "send to" folder (for example: "C:\Users\Administrator\AppData\Roaming\Microsoft\Windows\SendTo").
Now you can simply use "right click -> send to -> install WSP" to install any WSP file.


Thursday, November 5, 2009

Using HyperV VHD in Sun Virtual Box - no bootable medium found

Since last week I started migrating all my HyperV VM's into Sun's Virtual Box.

All my VMs migrated without a problem (after I learned I have to completely remove the HyperV before the virtual box would start...) except for one.

Trying to start it gave me an error: "fatal no bootable medium found system halted virtualbox" and I could not even use the VHD to format and reinstall it!

This one was a virtual windows 2008, 64bit with MOSS 2010 installed.
It was my only win2008 and my only 64bit VM - so I assumed this was the problem...

But, as it so happen, this was also the only VM I created in HyperV! All others were migrated from VPC or Virtual Server editions.

So, after a lot of research, formatting, copying, pasting I found the solution.

It appears that HyperV created VMs are not the same as VPC ones, and Sun VirtualBox does not recognize the HyperV VHDs correctly.

The quick and easy fix (which I didn't believe would work but did!) was to install VPC and use the VPC VHD wizard utility to compact the HyperV VHD.

Don't ask me why, but it did the trick and now my VHD is bootable in Sun VirtualBox!

Since I did not found any post on that matter anywhere I thought this might be handy for some of you.

Cheers

Tuesday, November 3, 2009

Social networking in SharePoint 2010

Here is a list of new things I picked up playing with the demo's and at the SPC2009 as well,

It turns out MS invested a lot in social networking in the new version of SharePoint, but is it enough? You decide,

I suppose many organizations are still new to the concept of employees having a rich virtual profile, but for some (larger once usually) this has become the reality.

So, what is new?
Among other things, I saw:
1. Silverlight organization chart – very nice one.
2. Activity feed.
3. My status note (integrated with live messenger if you want, or enter it in the portal if you don’t use live messenger/communicator)
4. Option to add twitter or other online community info to your profile with minimum customization (no real dev needed), Twitter has REST API this is why it is easy to use. Perhaps face book needs some dev.
5. Tagging, comments, ratings
6. Social data service
7. Relevance of search results is effected by my colleagues!

That’s it so far. Enjoy!

Monday, October 26, 2009

New in SharePoint 2010 Lookup fields

SharePoint 2010 introduces some new features in the lookup fields area.

The bad news are, I'm afraid, that still all lookups are restricted to the same site collection.

But, from now on you will be able to include more then one field in the remote list when creating a lookup. So that if you are creating a lookup to "customers" list, you can ask to see customer's first name, last name, company and email instead of just "full name" or "customer name" as before.

Another new feature allows you to enforce your lookup data integrity, meaning you can either prevent deleting an item that has other items connected to it, or cascade the delete action to delete all dependant items.
This is good for customers who has "project" list and "project tasks" list, where a task is connected to a project.
So, by deleting a project you can make sure that all that project tasks are also deleted.
Or - if you'd like, to prevent deleting a project wiht active tasks! which is also cool.

Finally, there are some news on reverse lookup. Although SharePoint 2010 does not fully support reverse lookup fields it has a new API for getting all related items for a specific list items.
This means, that this new API will get all items in SharePoint that has a lookup that is connected to the current item. This new API also comes with a new web part OOTB you can just drop at any list item view form to see its connected items.
But still, if you want real reverse lookup functionality you will have to go with a 3rd party solution like KWizCom's Cascading lookup plus field type currently available for SharePoint 2007 but will be upgraded as soon as there is a public release of 2010.

Another thing that is greatly missing (and is available in our cascading lookup) is... Cascading feature! :) I mean the option to filter items in one lookup field based on one or more other fields on the same page. Thus creating a 2 or more levels of dependant fields (Country/City/Street fields for example)
Well, good thing SharePoint 2010 is not perfect - gives us more work to do, right? :)


Enjoy your migraion!
If you need help, feel free to contact us,

Using LINQ and REST in SharePoint 2010

Among the new APIs available for SharePoint 2010 developers the 2 new most significant ones are LINQ and REST.

While developing server side code, you can now make use of LINQ to query your lists instead of using CAML.
The benefit of using LINQ is clear, working with strong typed objects and cutting down the development effort by a lot.
The problem comes when you are not sure what type of lists you are going to work on, and if you wish to support custom lists created by customers.
Before you can use LINQ on SharePoint you need to create an object that represent that list structure, and once the list changes (the fields you are querying are removed to renamed) you will not be able to use it anymore :(

But - remember, working on the server site with the SPList object is dengerous as well, as all you get are item[field_name] resutls, which is not strongly types and requies many validations to be done!

While working on the client side, you will be able to work using the client side object model (much like the server side, using Site/Web/List instead of SPSite/SPWeb/SPList we have on the server) but still that will not be strongly typed for you.
The news are that you will be able to use LINQ in the client side, that will allow you to automatically render the correct proxy objects in the client side (accessible from javascript / silverlight) and will be strongly typed!

So, by all means - start learning SharePoint REST syntax and commands...
here are some available commands to get you started:
$filter=
$expand=
$orderby={property}
$skip=n
$top=n
$metadata – bring all metadata of that object

These commands are accessible under the REST service URL which includes (sometimes) the entity name you wish to run against, like so:
http://site/subsite/_vti_bin/ListData.svc/{Entity Name}/{Options...}

This service URL can be registerd to the client using the standard ASP.NET AJAX way for registring services, and everything is made simple after that!

(If you need more info on ASP.NET AJAX you should definitly check these how-to's by Joe Stagner here: http://www.asp.net/learn/ajax-videos/ and specifically on registring services here: http://www.asp.net/learn/ajax-videos/video-82.aspx)

Well, are you excited as I am to move onto SharePoint 2010 yet? :)

Tuesday, October 20, 2009

How to override the sandboxed current site execution limitation

When you publish a solution in SharePoint as a sandbox solution, we already talked about that the proxy API will block any access to other remote site collections.

An easy override to this is simple - simply use the client API and you will be able to access any share point site you wish without going through the proxy API that a sandboxed solution uses.

Client API in SharePoint 2010

This is what I picked up in todays great session on client code;

Basically, Microsoft.SharePoint.Client is a wrapper that you can use at the client side (silverlight or javascript) to add get and update information.
Migration of code will require start using the Client API objects instead of the current API we all know in the server, but most objects are similar to help us update our code easily.
So - SPWeb will be web, SPList will be list etc...
Event SPContext exists as ClientContext!
the only difference is, that you run all your code on the clientContext object in the client side, and once you have a set of operations you wish to submit to the server you can do that by calling "clientcontext.ExecuteQuery()" or "clientcontext.ExecuteQueryAsync()" if you want the UI not to wait for the result.
If you wish to retrieve data form server to your client you can use the “Load” or “LoadQuery” methods. LoadQuery will return a result collection and will use method syntax or linq query syntax. It will build you XML query and will send them to the server next time you call “ExecuteQuery”.
Using the "Execute" or "Load" methods actually help reduce the number of trips done from the client to the server to reduce server load, bandwidth and improve responsiveness.
Nothing new, except you don't have to build your own wrapper and web services if you want to run some code on your SharePoint from the client. Basically this will communicate with client by dropping JSON code from the server to the client, the client will use the JSON to work with and send queries to the server in XML format.
I guess this will help us do less post back, as this will not be supported in wiki pages (no post back support).
A new cool thing is the SP.CamlQuery.CreateAllItemsQuery() method that renders a CAML that returns all items for a list. This will surly get you started with CAML query – the last stand of CAML in 2010 since views and forms are now defined by XSL.

More news from the SPC2009 will follow!

Upgrading SLFE from 2007 to 2010

** Updated: http://kwizcom.blogspot.com/2010/08/upgrading-customized-solutions-in.html **

This morning KWizCom’s VP R&D, Shai Petel, hosted an extremely well received session at Microsoft’s SharePoint 2009 conference in Vegas.

The session covered three topics: building a new solution, upgrading an existing solution and version management. Rather than speak about theory, Shai’s presentation gave attendees a firsthand perspective, based on an actual migration he did himself.

Read more and/or see the presentation Shai gave at SPC ‘09 here.

Monday, October 19, 2009

News on SharePoint 2010 from SPC09

Here are some things i picked up at the SharePoint conference 09 (announcing SharePoint 2010):

* No more SharePoint "hive" (12 folder)... from now on say SharePoint Root! VSeWSS2010 will redirect it to 12 folder or 14 folder or any other folder used based on your current running version of SharePoint.

* VSeWSS (Visual Stuio extensions for WSS) 2001 supports 1 and only 1 package per project. But in each project you can have as many features as you like.
The cool thing is that the features are shared between projects in the same solution! So you can include a feature from 1 project in several other deployment packages with all of its resources.

* Sandbox solutions
Now you can deploy solutions in a site collection, and not on the farm.
This means that the solution will be deployed and installed on that specific site collection.
Code in sandboxed solution runs inside a seperate process - not on W3WP, and has no direct access to SharePoint API. Instead it uses another proxy process that provide it with limited access to the SharePoint API. You will be able to do almost anything within your site collection, while you will have no access to remote site collections and read only acccess on your current web application and farm.
Some customizations are not supported within a sandbox solution, like code based workflow, site definitions etc.
Installing a sandbox solution is very simple - i will publish a how to with images soon but for general idea, you just need to upload it to your site collection solutions gallery (library) and activate it!
Sandbox solutions do not deploy any files anywhere! On first access to the solution code the SharePoint will load its code and resources into memory and will run it from memory.

* VSeWSS allows you to select if you want to allow the solution to be sandboxed. Choosing so will make visual studio validate that all my elements are supported within a sandbox solution - and promt me if I add something that is not supported.

* Visual web part - or is it?
The good: This is a new VSeWSS 2010 project template that allows you to create a user control as a web part. Simple, easy and long overdue.
The bad: This is not really a visual web part, its just a good old web part that loads a user control as its only child. At least all files (web part, user control files) are created, grouped and deployed for you.
The ugly: our old web parts we designed without a UI editor... we did our best though :)

I will post more as the SPC09 continues,
Shai Petel.

Client API in SharePoint 2010

With REST, ASP.NET Ajax, Microsoft.SharePoint.Client.dll new API - and of course silverlight all built into the new platform, our next generation of applications will have to have a major UI facelift.

You can expect much less page refreshes, more responsiveness and easier development proceess for more complex UI scenarios.

You have to keep in mind that SP2010 wiki pages do support web parts, but do not support postbacks!

So using these client-side calls will be almost mandatory if you wish to provide advanced controls and feature rich compoents in your pages.

Tuesday, September 22, 2009

Troubleshooting SharePoint 2010 Ribbon buttons

So,
While I was preparing to my presentation on SharePoint 2010 in Las Vegas next month, I wanted to show how to add some new cool buttons to the new ribbon menu.

I came across a lot of bloggers writing about this new feature (ribbon),
here is a nice how-to published by Sandeep K Nahta back at July:
http://snahta.blogspot.com/2009/07/add-button-to-ribbon.html

But what it does not say and took me a while to understand is few things that makes this not work according to plan...

1.

Keep in mind your feature must be at a site collection level otherwise it will not work.
Farm level will not load anything and site level will work in strange resutls like:
Adding the buttons twice, or if you activate it on 2 sites in the same collection - adding the buttons permanently even after you deactivate the feature and uninstall it.

2.

I wanted to name my actions SLFE.SomeAction (product code.actio name) for our SharePoint List Forms Extensions ( hence SLFE :) ), Now the buttons I added were disabled all the time. Took me a whilte to figure out that the action name must not containt special characters including ... so - keep that also in mind.

3.

The easiest way I found for adding buttons or groups into the existing ribbon is:
a
- find the location you want to add it in the existing ribbon definition file (C:\Program Files\Common Files\Microsoft Shared\Web Server Extensions\14\TEMPLATE\GLOBAL\XML\CMDUI.XML)
b
- locate the XML node you wish to insert you XML addition, and keep it's ID value.
c
- simply inject your XML in your feature elements file to that node's children collection like so (note the CommandUI. and ._children in the custom action's location):
<?xml version="1.0" encoding="utf-8"?>
<Elements xmlns="http://schemas.microsoft.com/sharepoint/">
  <CustomAction Id="KWizCom.SLFE.Ribbon.Library.Groups.SLFE" Location="CommandUI.Ribbon.Library.Groups._children" Sequence="2000" Title="SLFE">
    <CommandUIExtension>
      <CommandUIDefinitions>
        <CommandUIDefinition>
... XML as in the CUI schema ...
        </CommandUIDefinition>
      </CommandUIDefinitions>
    </CommandUIExtension>
  </CustomAction>
</Elements>

4.

If you don't see any buttons when you add a group - you must add "scaling" properties for that group!

Also - make sure your chosen template (i.e. Ribbon.Templates.Flexible) support your control's TemplateAlias (i.e. o1). Don't you just hate these XML cross references?!

I will post back here with more info on the ribbon as I find it, check back to update!

Thanks, Shai.

Tuesday, September 15, 2009

Performance issue using SPUtility.GetFullNameFromLogin

Recently we had a strange support call regarding our rating solution.

The customer experienced very bad performance using our rating field type, when opening the comments page for an item.

everything else was working very fast, pages loaded within a blink of an eye, only opening the popup that displays the comments and ratings from other users took anywhere from 10 to 40 seconds...

So, we created a debug version that prints out the time stamp of every stage of the page.
What the page does is basically, load all comments and ratings into a list and binds them into a repeater control.

So, we found out that while loading the comments we get the user login name, and since we want to show the user display name we use this SharePoint API method to get the display name from the login name:
SPUtility.GetFullNameFromLogin(site, "domain\\user_login");

well, to keep it simple, calling the method above to get the user display name took 8 seconds every time we called it, so for every comment on the item the page load time would take 8 more seconds!!!

The customer opened a support call to microsoft while we were investigating other alternatives for getting the user display name.

The answer the customer got from microsoft team was simple and did resolve the issue.
Simply instead of using SPUtility.GetFullNameFromLogin, they recommend using:

web.EnsureUser("domain\\user_login").Name;

so, the web.EnsureUser method works much faster and the performance problem was resolved!

Since I did not see any post about this on the web I thought I might as well write one myself - hope this helps some of you in the future.

Shai Petel.

Tuesday, September 8, 2009

Tired of "Obsolete" warnings on your project?

If you are like me, find yourself marking old code bits as "Obsolete" but have to keep them in your project for backward compatibility - you must be tired of all the visual studio warnings regarding using obsolete code - especially if it is your own code.

In most cases I have an "Upgrade" method that identifies old version installations and upgrade them to newer version constructs, but in this upgrade code I have to use some of the old obsolete code generating these annoying warning.

BUT - I do not wish to disable all Obsolete warnings - some are very important and I do wish VS to keep warning me about them.

So, the proper way to go is to mark specific code bits not to throw any warnings about using obsolete code. Like: telling the VS that within a specific code block I am aware that I am using some obsolete code and I don't want it to show in my build results.

I came accross the simple solution here that saved me a lot of time figuring out the correct pragma statement for this:
http://stackoverflow.com/questions/344630/ignore-obsoleteattribute-compiler-error

Here, Nick Bolton simple says:
"
What about using #pragma to disable the warning around the specfic code?
#pragma warning disable 0612
// Call obsolete type/enum member here
#pragma warning restore 0612
"


And guess what? It did the trick for me!

Tuesday, September 1, 2009

KWizCom is going to SharePoint Saturday New York City


This September KWizCom will be at SharePoint Saturday New York and you are invited to come along!

See the details of this exciting event on KWizCom’s SPS NYC event page.

Wednesday, August 12, 2009

How do I tell what the next list item ID is?

By Roi Kolbinger - SharePoint Consultant
KWizCom Professional Services –
http://www.kwizcom.com/


If you have ever worked with Event Handlers on an item you probably came across the same problem that was bothering me…

I created a ListItem and used the event handler ItemAdding (for a synchronic event). I tried to find out what my ID was but the value I got was zero.

This problem will not occur on ItemAdded (of a non-synchronic event) because the item is created separately and it has its own ID.

If you use the code below on ItemAdding,you will get a zero value on listItem ID.

SPList list = web.Lists[properties.ListId];
SPListItem listItem = list.Items[properties.ListItem.UniqueId];
int itemId = listItem.ID; // itemId always zero on ItemAdding event


To discover the ID (and avoid getting the zero value) of my synchronic event I wrote this code:

int itemId = list.Items[list.ItemCount - 1].ID + 1;

This code will work well as long as you do not delete the last item and do not add more than one item simultaneously. If you do the sum you will get will be incorrect.

I searched for a SharePoint API that would give me the next item ID but found none. It seemed no one had tackled this problem….

After extensive searching I found a solution, brilliant in its simplicity. This is the code:

///
/// Get the next available item id from a list
///

/// < name="site">site
/// < name="listId">listId
/// <>
public static int NextItemID(SPSite site, Guid listId(
{
int id = -1;
Microsoft.SharePoint.SPSecurity.RunWithElevatedPrivileges(delegate()
{
if (site.WebApplication.ContentDatabases.Count > 0(
{
string DBConnString = site.WebApplication.ContentDatabases[0].DatabaseConnectionString;
SqlConnection con = new SqlConnection(DBConnString);
try
{
con.Open();
SqlCommand com = con.CreateCommand();
com.CommandText = String.Format("select tp_NextAvailableId from AllLists where tp_ID = '{0}'", listId.ToString());
id = (int)com.ExecuteScalar();
}
finally
{
con.Close();
}
}
});
return id;
}

...
int itemId = NextItemID(new SPSite(properties.SiteId), properties.ListId);


As you can see, the solution is to connect to the MOSS database and read the ID AllList table. All the information was right there, we simply had to access it.

Now you know how to get the next ID of the ListItem and (hopefully!) Event Handlers will no longer give you any trouble!...

Credits:
The solution detailed in this article was found at:
http://suguk.org/forums/permalink/6226/13513/ShowThread.aspx

Tuesday, July 21, 2009

How to register safe control to web.config manually

Here is a little code example I found at MSDN that allows you to add a safe control to the web application web.config file throughout the SharePoint farm.

It uses the SPWebConfigModification class to add the change and will, make sure your changes gets re-applied whenever a new web application is created in the farm!

Note, you can add all sorts of modifications using this class - not only safe controls.
As Daniel Larson wrote in the comments for the MSDN article, for web controls - if possible you should use other methods of deployment and update the safe control in the manifest xml file.

taken from: msdn SPWebConfigModification

SPWebService myService = SPWebService.ContentService;

SPWebConfigModification myModification = new SPWebConfigModification();
myModification.Path = "configuration/SharePoint/SafeControls";
myModification.Name = "SafeControl[@Assembly='MyCustomAssembly'][@Namespace='MyCustomNamespace'][@TypeName='*'][@Safe='True']";
myModification.Sequence = 0;
myModification.Owner = WebConfigModificationFeatureReceiver.OwnerId;
myModification.Type = SPWebConfigModification.SPWebConfigModificationType.EnsureChildNode;
myModification.Value = "";

myService.WebConfigModifications.Add(myModification);
myService.Update();
myService.ApplyWebConfigModifications();


I found that usefull when a customer of ours wanted to use a custom field inside a publishing page layout... the original installer did not add the safe control since you dont need it when you are inside list item form (create/edit/view), but inside a publishing page layout we got a message saying the control is not registered as safe.

Hope you do to, Shai.

Monday, July 20, 2009

Helpful batch file command for installers

Hi,

Just a short one this time,

here is a nice script for looping through all MSI files in current folder / sub folders and running the installers one after the other.

Just paste this into a install.bat file and place with your set of installers:
for /f "delims=" %%a IN ('dir /s /b *.msi') do MSIEXEC /i "%%a"

simple, 1 line of script made my life easier with WikiPlus.

You see, installing it involves running installers for 5 different products so this way I just throw them into sub folders and this little script does the rest for me.

:)

Enjoy,

Tuesday, July 14, 2009

How do I duplicate a list item without code?

By Roi Kolbinger - SharePoint Consultant
KWizCom Professional Services – http://www.kwizcom.com/

Did you ever wish to copy an Item to the current list several times? What is the best way to duplicate a list item? Can it be done without code?

There is an easy, effective way and no – you don't need code! Here's how:

All you need to do is to create two new columns and SPD workflow.

Step 1: Create columns

Name the first new column you create according to the number of copies you want to make. When defining the type of information that will be in the column, choose "number". This column is where you will define the number of copies you want to create.

Name the second column according to the number of copies you want, minus one. Define the type of information that will appear in this new column as "Calculated" (this gives a number which is the result of a calculation based on a different column).
The calculation we will use here will take the first column and subtract from it -1.
The formula to use for doing this is =[number of copies]-1 like so:

Step 2: Create a new workflow at the SPD

Open the site at the SPD and then create a new workflow.
Give the workflow a name and select the list from which you desire to copy the Item. Then select your workflow start options. It is best to choose: "automatically starts the workflow whenever the item is been changed". This will renew your workflow each time the item has been updated and/or edited and insure that the calculated result is always accurate.

Next, define the step of the workflow – select "Number of copies" greater the zero.

And then, define two actions:
1) Update your item: "Numbers of copies" is will be "Number of copies minus one".


2) Create a new item in the list that duplicates the columns taken from the original item. Do not include the "Number of copies" column! If you do an infinite loop will be created.


Now when you go to an item that you wish to duplicate, all you need to do is edit the item and write the numbers of copies that you want to make in the "Number of copies" column and your copies will be made! Easy and simple with no code necessary at all!

Sunday, July 12, 2009

Delegate Controls: What, Where and How

See the presentation Shai gave during SharePoint Saturday:

** updated slide here: http://kwizcom.blogspot.com/2010/08/delegate-controls-what-where-and-how.html **


Download this presentation and a code example here.

Monday, July 6, 2009

KWizCom is going to SharePoint Saturday Toronto!


This month KWizCom is going to the first-ever SharePoint Saturday Toronto and you are invited to come along!

KWizCom is proud to participate in and sponsor this grass-roots event. SharePoint Saturday events are free, community-focused SharePoint events dedicated to educating and engaging members of the local technical community.

SharePoint Saturday will be an educational, informative & lively day filled with sessions from respected SharePoint professionals & Microsoft MVPs, covering a wide variety of SharePoint-oriented topics. Amongst them will be KWizCom's own VP R&D Shai Petel, who will be presenting a session on
"Delegate Controls: What, Where and How"

KWizCom representatives will be amongst a select group of vendors with a booth at SharePoint Saturday. Come talk to us and learn about the many opportunities and benefits of working with KWizCom!
We have prepared a special gift for everyone who visits our booth but you have to attend to benefit!

SharePoint Saturday Toronto will take place:
On: Saturday, July 11th, 2009
At: Microsoft Canada Conference Centre
1950 Meadowvale Blvd, Mississauga, Ontario, Canada.

The day starts at 9:00 AM with a short introductory keynote and ends at 4:30 PM.
Lunch will be provided and there will be numerous giveaways throughout the day.
Come join us for a day of fun, learning, networking and – SharePoint!

Register for the event
For more information, please visit
www.sharepointsaturday.org/toronto.

Tuesday, June 23, 2009

Radio Button Custom Field Choice – Going from Vertical to Horizontal with Java Script

By Roi Kolbinger - SharePoint Consultant
KWizCom Professional Services – http://www.kwizcom.com/

Have you noticed that field choice only gives a vertical view?
But what if I want a horizontal view?
When you want to customize your view but don't know how it can be very frustrating but there is always a way, you just have to know how…

For example:
I want to use the field "Gender" with two choice options – male and female.
This is how such a field would normally look in MOSS:


But I don't want to waste so much screen space. It would be much better to have something like this:


With a little Java script it's not so hard to go from vertical to horizontal. Here's how you do it:
Simply add this code to the form (add it in the SPD to NewForm.aspx and EditForm.aspx for the list that includes the view you want to change):


That all – now we have our Male/Female options in the desired view layout!

+++++++++++++++++++++++++++++++++++++++

For more helpful tips and guidelines please visit: http://kwizcom.blogspot.com/
NEW – You can now follow KWizCom on Twitter:
https://twitter.com/KWizCom

Thursday, May 14, 2009

Creating a field in a List and getting the error: "Index was outside the bounds of the array"

Today, while I was code reviewing a new release of our rating field type I got a weird error message...

We added a new feature that adds 2 read only fields with the total number of ratings and number of comments.

Code example for addnig new fields was simple:
if (!list.Fields.ContainsField(ratingField.FieldName_NumOfCommentsInternalName))
{
list.Fields.Add(ratingField.FieldName_NumOfCommentsDecodedName, SPFieldType.Number, false);
//Some more logic here
}


Pretty simple, only when this code runs this time (3rd unit testing sessions before release to customer review) suddenly I get the error message above "Index was outside the bounds of the array".

Well... I ran it in debug few time, scratching my head few times more, but nothing - same error every time!

OK, time for drilling into SharePoint code I guess...
The exception stack trace was as following:
at Microsoft.SharePoint.Utilities.SPStringUtility.EscapedCodeToLower(String str)
at Microsoft.SharePoint.SPFieldCollection.FixFieldV3Attrs(XmlDocument xd, XmlElement xe, Guid& fid, String& name)
at Microsoft.SharePoint.SPFieldCollection.TranslateFieldSchema(String schemaXml, Guid& fid, String& strDisp, String& strStaticNew)
at Microsoft.SharePoint.SPFieldCollection.AddFieldAsXmlInternal(String schemaXml, Boolean addToDefaultView, SPAddFieldOptions op)
at Microsoft.SharePoint.SPFieldCollection.AddFieldAsXml(String schemaXml, Boolean addToDefaultView, SPAddFieldOptions op)
at Microsoft.SharePoint.SPFieldCollection.AddFieldAsXml(String strXml)
at Microsoft.SharePoint.SPFieldCollection.AddInternal(String strDisplayName, SPFieldType type, Boolean bRequired, Boolean bCompactName, Guid lookupListId, Guid lookupWebId, StringCollection choices)
at Microsoft.SharePoint.SPFieldCollection.Add(String strDisplayName, SPFieldType type, Boolean bRequired, Boolean bCompactName, StringCollection choices)
at Microsoft.SharePoint.SPFieldCollection.Add(String strDisplayName, SPFieldType type, Boolean bRequired)
at KWizCom.SharePoint.Rating.ListRatingUtilities.CreateRatingCountFieldsInList(SPWeb web, SPList list, RatingField ratingField)


Revealing that the exception was raised from a method called:
Microsoft.SharePoint.Utilities.SPStringUtility.EscapedCodeToLower(String str)

So far - makes sense... string parsing is always the number one cause for index bound exceptions, right?

So, I wanted to check what was wrong with the field name I was trying to create...
ratingField.FieldName_NumOfCommentsDecodedName "2Rating Site Column_x" string


See that my field name ends with "_x"...

The code I extracted from "EscapedCodeToLower" had the following line in it:
if (((str[i] == '_') && (i < (str.Length - 1))) && (str[i + 1] == 'x'))


Well, now everything was clear to me.

Microsoft uses "XmlConvert.EncodeName" in order to encode fields internal names in SharePoint. This encoding method replaces illegal characters with "_x0020_" for example. Apparently this method looks up every "_" that was followed by "x" and assumes it is a token it needs to decode... But what happens if my text ends with "_x"?

Aha! You get your "Index was outside the bounds of the array" exception!

So, I guess now I have to add a check to my code. I Doubt anyone would notice it or bother to fix it.

Well, I googled that error message regarding SPList.Fields.Add and got nothing - hopefully this will help someone in need in the future...

Shai.

Monday, May 11, 2009

How to backup and restore a website with Variations

The article below was written by Armine Vardanyan, a SharePoint SharePoint Implementer for KWizCom Professional Services. Armine explains step by step how to backup and restore a website with Variations

************************************

When you backup a SharePoint site that uses the Variations feature, the variation jobs you created are not automatically backed up. Thus, before restoring your site to a new web application, you will need to create Variation labels and the needed hierarchy so that the variations jobs will be created automatically. Once this task is completed you will be able to restore your site safely, without losing any information.


Here's how to correctly backup and restore your site, with its Variation labels:

1. You need to backup the web application by using stsadm(recommended):
stsadm -o backup -url
http://portalname/ -filename myBackup.bckSee How to copy site collection from one server to anther (Backup and Restore).
2. Create a new web application from the “SharePoint Central Administration” where you want to restore the backup and create the site collection. (/).


3. Go to your created web-site.
4. Go to “Site Settings” > Site Settings > Modify All Site Settings
5. Under the “Site Collection Administration” section click on “Variation labels”


6. Click on New Label and create your Variation labels (same as when you created them in the site you backed-up)
7. Click on Create Hierarchies.


8. After the hierarchies were created you can restore your backup and overwrite by:
stsadm -o restore -url
http://newportalname/ -filename MyBackup.bck –overwrite

Not so hard right?

Monday, May 4, 2009

Problems accessing MOSS with IE8?

The article below was written by Armine Vardanyan, a SharePoint SharePoint Implementer for KWizCom Professional Services.

****************************

Problems accessing MOSS with IE8?

by Armine Vardanyan

Ever try to access your site through IE8 (Internet Explorer 8), enter your user name and password in the following window:


Only to see the window pop up again? You click OK and again it comes up? And again?!
Suddenly you get the following error:


Your server is probably running IIS 5.1 or IIS 6…

There are two ways you can fix this problem:

• Method 1: Specify host names
• Method 2: Disable the loopback check


Method 1: Specify host names
Note: We recommend that you use this method.

To specify the host names that are mapped to the loopback address and can connect to Web sites on your computer, follow these steps:

1. Click Start, click Run, type regedit, and then click OK.
2. In Registry Editor, locate and then click the following registry key:
HKEY_LOCAL_MACHINE\SYSTEM\CurrentControlSet\Control\Lsa\MSV1_0
3. Right-click MSV1_0, point to New, and then click Multi-String Value.
4. Type BackConnectionHostNames, and then press ENTER.
5. Right-click BackConnectionHostNames, and then click Modify.
6. In the Value data box, type the host name or the host names for the sites that are on the local computer, and then click OK.
7. Quit Registry Editor, and then restart the IISAdmin service.

or using Method 2:
Disable the loopback check

Follow these steps to disable the loopback check:

1. Click Start, click Run, type regedit, and then click OK.
2. In Registry Editor, locate and then click the following registry key:
HKEY_LOCAL_MACHINE\SYSTEM\CurrentControlSet\Control\Lsa
3. Right-click Lsa, point to New, and then click DWORD Value.
4. Type DisableLoopbackCheck, and then press ENTER.
5. Right-click DisableLoopbackCheck, and then click Modify.
6. In the Value data box, type 1, and then click OK.
7. Quit Registry Editor, and then restart your computer.

For more information on this method go to:
http://support.microsoft.com/kb/896861/en-us


Saturday, April 25, 2009

Taxonomy Management Using MOSS 2007

This week Shai gave an hour and a half lecture on Taxonomy Management using MOSS 2007. The lecture took place at the Nexient Training Center and was for the Toronto SharePoint User Group.

Shai reported that he enjoyed the User Group meeting, saying: "It was nice to finally meet all the guys, Bill Brockbank (Microsoft Office SharePoint Server MVP, MCTS) and connect with the people at the Nexient Training Center and the SharePoint Buzz guys..."

This is the presentation he gave:


Sunday, April 5, 2009

Want to know how to skip SharePoint spell check for an input control?

This may seems strange to you at first, but today I got an email from our support engineer that reads:

Hi,
When doing spell checking on a list form with the cascading field type, we are getting this error:


Please assist

Well... I know what you were thinking... this guy has some serious spelling mistakes, right?

Thing is, this text wasn’t actually a user input text – it was a hidden text box. You see, for debugging purposes we sometimes use textboxes with style=”display:none” instead of input type:”hidden” fields.

While SharePoint Spell Check skips hidden inputs, it does not skip hidden text boxes, so our textbox gets the same treatment as all other user inputs on the page.
In our Cascading Lookup Plus Field Type we use hidden inputs like that to store information between post backs. We believe it is important that users not get prompted for spelling in these controls, let alone try and fix them!

So, after searching MS documentation with no luck (big surprise eh?), I came across one lone blog post that speaks of the SharePoint spell check feature, and specifically how to register a control to be excluded from spell checking.

Turned out to be a rather simple task, all you need to do is add excludeFromSpellCheck=”true” to any input control you don’t want checked and you are done!

P.S. funny thing is that the SharePoint people picker field control also gets spell checked, prompting users on their domain name or user names...


Maybe there will be a fix for that someday as well...

For now – at least we can update our field controls and other web parts accordingly.

Good luck and happy SharePointing!

Shai.

Saturday, March 28, 2009

Benefits for KWizCom Customers

If you are a KWizCom customer you can recieve the free add-on of your choice!

Here's how:

+ Send us 3 high resolution screenshots depicting how you implemented KWizCom add on/s in your organization.
+ Write a sentence or two describing the solution you implemented and the benefit you gained from your add on
+ Send us your company logo – make sure it's high resolution!

The best screenshots and quotes will appear in a KWizCom slideshow displayed at this year's
UK SharePoint Best Practices Conference.

In addition - each customer who submits screenshots and quotes will qualify to choose one KWizCom add on free of charge!

You gain:
+ Free promotion of your organization – boost your image as a sophisticated, technologically advanced organization
+ Free KWizCom add-on of your choice!

Your investment – 1 email

This special, onetime offer expires Tuesday March 31st!

Send your screenshots to: forest@kwizcom.com

Be sure to specifiy which add-on you have chosen!

Thursday, March 12, 2009

SPException: Trying to use a SPWeb object that has been closed or disposed and is no longer valid

Ever seen this error? See if it sounds familiar…

Just about any developer working long enough with SharePoint will, at some point, wake up in the middle of the night with the words "Memory Leak" echoing in through their head... No - it is not the cat's fault, and no it does not mean you forgot to take out the trash again... What did happen? You came across one of Microsoft's "best practices" articles regarding disposing of SPWeb and SPSite objects in SharePoint…

According to the original MS guidance, every SPWeb or SPSite object you create (or get) that was not initiated within the page's context (i.e. not SPContext.Current.Web and not SPControl.GetContextWeb(Context) ) must be disposed of.

It used to be that the "using" statement construct was recommended to avoid forgetting to dispose… in other cases you'd put up a flag and dispose of it at the end of your code's life cycle - either way was good enough.

Being the "good guys" that we are, we went over and updated all of our codes and components to match these guide lines.
And what happened? Every once in a while disposing these objects would cause baffling errors such as: "Trying to use a SPWeb object that has been closed or disposed and is no longer valid".

But hey, if we call SPContext.Current.Site.RootWeb - the best practices guidelines said we have to dispose of it! Same goes for SPContext.Current.Web.Site and SPContext.Current.Web.Site.RootWeb etc.

Recently I came across a great article by Roger Lamb showing a few updates from Microsoft regarding these disposable objects and recommendations.

So - pay close attention to these updates… it just might help you sleep through the night!

* When making a call to SPContext.Current.Web.Site.RootWeb - you now have to dispose only of the SPSite object: SPContext.Current.Web.Site!

Basically, you should NOT dispose of the SPSite.RootWeb object directly.

* When calling SPWeb.ParentWeb - you should NOT dispose of the ParentWeb object!

* Same goes to SPList.ParentWeb - do NOT dispose of the SPWeb object.

Other updates I found interesting (and frustrating) are:
* Calling SPWeb.AllWebs collection requires you to dispose of this collection object.
* Creating a new site by SPWeb.Webs.Add() - need to dispose of the web object returned.
* Calling GetLimitedWebPartManager() method? It will create a SPWeb object of its own and not dispose of it properly.

Please review the complete updated best practices guide at MSDN here:
http://msdn.microsoft.com/en-us/library/aa973248.aspx

I hope Microsoft will release an update for this issue soon.. Just thinking of all the code lines I wrote under the wrong best practices article is making me dizzy...

Good luck and happy disposing!

Shai Petel.

=~=~= Update =~=~=
Ok, this explains why it took me so long to find this problem...
I had this code in my web part, written according to the original best practices:
using(SPSite site = SPContext.Current.Web.Site)
{
    using(SPWeb web = site.RootWeb)
    {
        //Some code here...
    }
}

I cannot explain this but I only got this error on some sites, and on others it worked OK. Strange huh?
What I found is that this code will throw exception on any team site I created within a site collection that is not in the web application root path (i.e. sites under http://server/sites/*).

Anyway - according to the new guidelines, I should not dispose of the RootWeb object in this case. If I dispose of the SPSite object - it disposes of the RootWeb object -in this case my context web object...
So I updated my code to something like this and it worked:
SPWeb web = SPContext.Current.Site.RootWeb;//No disposing
//Some code here...

Sunday, March 1, 2009

Search Results

By Sveta Yerpilev - SharePoint Technical Consultant

KWizCom Professional Services – www.kwizcom.com

A client of mine once requested that I change the look and feel of their search results page. The client was a large company that had decided to change the design of their SharePoint portal. The portal had a search center which was where I needed to make the change.

This is how I did it:

First of all I needed a Core Results Web Part. You can add a web part to your results page from the Web Parts Gallery or use the SharePoint web part that is automatically added to each search results page.

Next I had to setup the fields (columns) I wanted to see in the search result. To do so - open the properties of the Core results web part and under the Results Query Options change the Selected Columns xml text. To add a new column you need add this text to the xml before tag:


Save the changes and now you can start to redesign the look and feel of the search results. The fastest way to do this is to use the XML of the search results. To access the XML you need to add this code instead of the XSLT code of the web part in the XSL Editor:


Save your changes and do a test search. You will get an XML code of the search results. Copy this code and paste it to notepad. Save the file on your desktop and open SharePoint Designer. Connect to one of your SharePoint sites and create a new blank ASPX page. After this go in to the design mode of your page and add a new DataView Web Part. In the Data Source details choose the XML files and add a new XML file. In the new opened window browse to the file you saved before and import it to SharePoint Designer.

Once you perform this operation you'll see your file in the XML files section. Click on this file and press "Show Data".

Now you will be able to design your Data View Web Part however you want, using columns from the Search Results XML file. You will also be able to perform sorting/filtering/grouping on your search results but keep in mind that each function will create results only on the page you are currently using. In other words, if you sort your search results by site title the grouping will group the content of your current search results page.

After you finish designing your page you the only thing left you need to do is copy the entire code from your page, between the tags and , and paste it to the XSL Editor of the Core Results Web Part. Save your changes and verify that everything works by doing a test search. If you like the look of your search results page you can delete the temp ASPX page from your SharePoint site and delete the search results XML file.


If you would like more information on customizing a search results page I suggest this insightful article by Tobias Zimmergren:
http://www.zimmergren.net/archive/2008/03/15/moss-2007-customize-the-search-result-using-xslt-part-3-customize-using-sharepoint-designer-2007.aspx

SharePoint gives you many options for customizing your search results.

You can define different search results pages for each search scope you run.

You can set a specific search results page on the server level and redirect all search results to that page.

You can even define a search results page for a Search Box Web Part - it will redirect all search results (not including the Contextual Search Scope Search results) to the page you defined.

If you create a new Search Center you may want to redirect all search queries to the Search Center search results page.

You can setup this function on the scopes level or in the Search Settings of the root site in your Site Collection.

I hope this article (and the first two parts of this series) on SharePoint search results has been helpful to you. Please continue to visit the KWizCom blog for more helpful information, SharePoint tips and "how to" guides. We are here to help!


Wednesday, February 25, 2009

Tuesday, February 24, 2009

KWizCom sponsors the Markham .NET User Group

KWizCom believes in knowledge sharing and education. That is why KWizCom supports groups and institutions that promote these issues. The Markham .NET User Group is one such example.
The Markham .NET User Group was founded by Rostam Jarrah and
Reza Alirezaei, experts in content management, SharePoint and more. The two felt the lack of a .NET dedicated user group in Markham, Ontario and thus decided to create one.
The group focuses on various .NET technologies at each session such as mobile, web, Office, SharePoint and other emerging .NET technologies. The main goal in mind is to enable knowledge sharing, allowing members to learn from each other and gain new insights.
KWizCom, known for supporting grade school and college education, sees importance in promoting further studies for professionals. Group synergy like that in the Markham .NET User Group creates the atmosphere to bring about advancements and solutions that can, ultimately benefit
all. When education and community benefit calls - KWizCom is there, each step of the way.

Sunday, February 22, 2009

Add a web part to your web parts gallery using a feature

Want to add web parts to your web parts gallery using a SharePoint feature?
Let me show you the easiest way...


Background
If you want register a web part for a site collection, you should add the web part to the Web Part Gallery in the site collection.
The KWizCom Tagging Feature is convenient to use here as it allows you to see the Tags Cloud Web Part in the site collection where the Tagging Feature is activated.
It is important you understand everything in SharePoint 2007 is based on features. So - to add your web part to the web parts gallery you will need to create a special feature for your web part with the correct scope as well:
Let’s say you have sample web part named “MySampleWebPart”.
The first thing you need to do is create a folder named “MySampleWebPart” inside the Features folder: C:\Program Files\Common Files\Microsoft Shared\web server extensions\12\TEMPLATE\FEATURES\MySampleWebPart
Now, copy your “MySampleWebPart .dwp” file inside the newly created folder and create 2 XML files named “elements.xml” and “Feature.xml”.
To complete your work you should modify both XML files and then install and activate the feature.
Open the “Feature.xml” file for editing (for example in notepad) and put the following XML there:


Note: Each feature must have a unique ID. Please make sure that you use your own generated GUID for it.
Open the “elements.xml” file for editing (for example in notepad) and put the following XML there:


Done!
Now, you can install and activate the feature that will add the web part you the Web Parts Gallery.


Install Feature
Run STSADM command:
“C:\Program Files\Common Files\Microsoft Shared\web server extensions\12\BIN\stsadm” -o installfeature –name MySampleWebPart –force

Activate Feature
After installation, you should have this new site collection feature:


Activate the feature to see the web part in web parts gallery.

Result
If you did everything correctly, you will see your web part in Web Part gallery

Tuesday, February 17, 2009

How do I save a publishing site as a template?

You may have noticed that the “Save site as template menu” under “Look and Feel” site settings category is missing. This brings one to ask:
How do I get it back? And more importantly: Why was it removed?
In the following article I will answer these questions and give you tools to address this issue on your own.

Background

In WSS sites, when you go to site settings page, this is how your “Look and Feel” category looks:


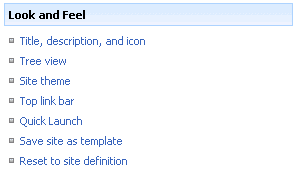
Notice you have the “Save site as template” menu option there.
It is important to understand that everything in SharePoint 2007 is based on features. So – you would be correct to assume this menu option is also a feature:
Feature folder: C:\Program Files\Common Files\Microsoft Shared\web server extensions\12\TEMPLATE\FEATURES\SiteSettings
Feature file: SiteSettings.xml
Definition:
<customaction id="SaveAsTemplate" title="$Resources:SiteSettings_SaveAsTemplate_Title;" location="Microsoft.SharePoint.SiteSettings" groupid="Customization" rights="AddAndCustomizePages,BrowseDirectories,ManagePermissions,ManageSubwebs,ManageWeb,UseRemoteAPIs,ViewFormPages" sequence="60"><customaction id="SaveAsTemplate" title="$Resources:SiteSettings_SaveAsTemplate_Title;" location="Microsoft.SharePoint.SiteSettings" groupid="Customization" rights="AddAndCustomizePages,BrowseDirectories,ManagePermissions,ManageSubwebs,ManageWeb,UseRemoteAPIs,ViewFormPages" sequence="60"><customaction id="SaveAsTemplate" title="$Resources:SiteSettings_SaveAsTemplate_Title;" location="Microsoft.SharePoint.SiteSettings" groupid="Customization" rights="AddAndCustomizePages,BrowseDirectories,ManagePermissions,ManageSubwebs,ManageWeb,UseRemoteAPIs,ViewFormPages" sequence="60"><customaction id="SaveAsTemplate" title="$Resources:SiteSettings_SaveAsTemplate_Title;" location="Microsoft.SharePoint.SiteSettings" groupid="Customization" rights="AddAndCustomizePages,BrowseDirectories,ManagePermissions,ManageSubwebs,ManageWeb,UseRemoteAPIs,ViewFormPages" sequence="60"><customaction id="SaveAsTemplate" title="$Resources:SiteSettings_SaveAsTemplate_Title;" location="Microsoft.SharePoint.SiteSettings" groupid="Customization" rights="AddAndCustomizePages,BrowseDirectories,ManagePermissions,ManageSubwebs,ManageWeb,UseRemoteAPIs,ViewFormPages" sequence="60"><customaction id="SaveAsTemplate" title="$Resources:SiteSettings_SaveAsTemplate_Title;" location="Microsoft.SharePoint.SiteSettings" groupid="Customization" rights="AddAndCustomizePages,BrowseDirectories,ManagePermissions,ManageSubwebs,ManageWeb,UseRemoteAPIs,ViewFormPages" sequence="60"><customaction id="SaveAsTemplate" title="$Resources:SiteSettings_SaveAsTemplate_Title;" location="Microsoft.SharePoint.SiteSettings" groupid="Customization" rights="AddAndCustomizePages,BrowseDirectories,ManagePermissions,ManageSubwebs,ManageWeb,UseRemoteAPIs,ViewFormPages" sequence="60">
<urlaction url="_layouts/savetmpl.aspx">
</customaction></customaction>
<urlaction url="_layouts/savetmpl.aspx"></customaction><urlaction url="_layouts/savetmpl.aspx"></customaction>
<urlaction url="_layouts/savetmpl.aspx"></customaction><urlaction url="_layouts/savetmpl.aspx"></customaction><urlaction url="_layouts/savetmpl.aspx"></customaction>

When you create a publishing portal site (internet facing or intra net collaboration portal) you will notice that among other changes, the “Look and Feel” site settings category has changed, a lot:


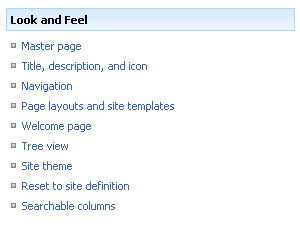
Notice, there is no longer the option to "save site as template".

So, keeping in mind that everything in SharePoint is controlled by features – think of a publishing site as a normal WSS sites that had some features activated in it (*this is not 100% accurate, but as it simplifies things we will say so, for the sake of the example).
Looking further in our Feature folder, you will easily find several feature folders that belong to the publishing site. One of these features calls you to hide the save as template menu from the site settings:

Feature folder: C:\Program Files\Common Files\Microsoft Shared\web server extensions\12\TEMPLATE\FEATURES\Publishing
Feature file: PublishingSiteSettings.xml
Definition:
<hidecustomaction id="HideSaveAsTemplate" location="Microsoft.SharePoint.SiteSettings" groupid="Customization" hideactionid="SaveAsTemplate"><hidecustomaction id="HideSaveAsTemplate" location="Microsoft.SharePoint.SiteSettings" groupid="Customization" hideactionid="SaveAsTemplate"><hidecustomaction id="HideSaveAsTemplate" location="Microsoft.SharePoint.SiteSettings" groupid="Customization" hideactionid="SaveAsTemplate"><hidecustomaction id="HideSaveAsTemplate" location="Microsoft.SharePoint.SiteSettings" groupid="Customization" hideactionid="SaveAsTemplate">

Notice the use of the HideCustomAction tag, with the corresponding HideActionld “SaveAsTemplate”.

Why is the “Save site as template” menu option removed from publishing sites?


Many of my customers use publishing sites. A lot of them tried to use the save as template option (some using code, some using a feature like the one below) and we all came to the same conclusion:
Since publishing sites have pages in them and layouts that are all connected to a content type that is configured at the top level site of the site collection, and because these content types are not saved and moved within the site template STP file – the STP file not, as one would expect it to be, a true reflection of the original site.
This means that if you save a publishing site as template and use it in the same site collection, providing all site content types it uses remain unchanged, the site template will work properly.
The problem arises when you try to move the site template to a different site collection, or when you've changed or deleted some content types in your current site collection – this will result in unexpected behaviour (that from my experience is irritating but fixable, with some work).
So, if you want to use the site templates within the same site collection, or if you use only the out of the box content types (welcome and article) with no changes, you should have no difficulties.

How do I add the “Save site as template” option back to publishing sites?


Here is what you need to do to add this option back to your publishing site. It's very simple; it will take approximately five minutes of work!
Simply create, install and activate a feature that will bring this menu option back to life!

Create feature
Create a feature that re-registers a “save as template” action to site settings. I said 5 minutes, right? So here is a feature ready to use (it's my free gift to you! ;)
Save the folder inside the ZIP file, under your server’s features folder.

Install Feature
Run STSADM command:

"C:\Program Files\Common Files\Microsoft Shared\web server extensions\12\BIN\stsadm" -o installfeature -name AddSaveTemplateToPublishingSiteSettings –force

Activate Feature
After installation, you should have this new site collection feature:


Result
If you did everything correctly, your new publishing site settings “Look and Feel” section will appear like this:


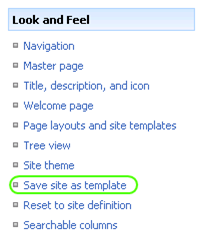
You will now be able to "save site as template".
Easy, huh?!

* There may be other side effects of saving a publishing site as template. This article is for the community information benefit only and will not hold KWizCom responsible to any issues caused by this. It is strongly recommended you test on a pre production environment before you use this tip in a production server.